Author: Contributor

Top DIY Gutter Protection Hacks for Homeowners
how to clean gutters

Maintaining your home’s gutters is crucial to prevent costly damage from water overflow, and knowing how to clean gutters effectively can make a big difference in preserving their function. Proper gutter maintenance extends the system’s life and prepares you for any DIY gutter replacement projects if needed. By implementing some simple DIY hacks, homeowners can improve gutter performance, keep leaves and debris at bay, and ensure that gutters are ready to handle any season. Here’s a breakdown of easy, effective ways to protect and maintain your gutters.

One of the most fundamental steps in protecting your gutters is regular cleaning. Leaves, dirt, and other debris can quickly build up, clogging the system and leading to water overflow. For a DIY approach, you’ll need gloves, a sturdy ladder, a small garden trowel, and a hose to flush out any remaining grime. Cleaning gutters at least twice a year, especially in spring and fall, ensures they stay clear and function efficiently. Remember to check for any loose or sagging sections during cleaning; these can indicate early signs of wear and may require adjustments.

Gutter guards are a highly effective way to prevent debris buildup while allowing water to flow freely through the gutters. Several kinds of DIY gutter protection exist, such as mesh nets, foam inserts, and brush shields. Mesh screens are prevalent for their ability to block leaves and small twigs. Cut the mesh to fit your gutter sections for a straightforward installation, then secure it with clips. This easy solution reduces maintenance and extends the life of your gutters by preventing frequent blockages.

Over time, gutters can fade or pull away from the house, especially if they repeatedly hold water or debris. Installing additional gutter hangers provides extra support, helping them stay firmly attached to the roofline. You’ll need to drill into the fascia and secure the hanger clips evenly along the gutter. These hangers keep the gutter level, which is essential for proper water drainage, and they’re instrumental in areas that experience heavy rain or snow.

Downspouts are critical components in a gutter system, and keeping them clear ensures efficient water flow away from the foundation. To prevent clogs, consider installing downspout filters, which trap debris before it enters the downspout. A simple DIY hack involves cutting a small section of wire mesh and securing it at the top of each downspout. These methods allow water to flow through while catching leaves and other debris. Check these filters regularly, as they can fill up over time and may need a quick clean.

diy gutter replacement

Once water exits the downspout, it should be directed away from the foundation to avoid soil erosion and basement flooding. Installing splash blocks at the end of each downspout is a straightforward solution that diverts water from the house. These blocks come in various styles and materials, making it easy to find one that complements your landscaping. They’re also an affordable way to add extra protection for your home’s foundation, keeping water diverted from areas where it could cause issues.

Leaky gutters can lead to water dripping down the side of your house, potentially causing damage over time. Sealing the seams is an easy fix that can make a big difference. Use a waterproof gutter sealant to cover all seams and joints and any small holes that might have developed. This hack benefits older gutters, where wear and tear may have created minor leaks. By sealing these areas, you help maintain the structural integrity of the gutter system and prevent water from escaping at unwanted spots.

If you live in a colder climate where ice dams are a concern, installing DIY heat cables can prevent ice from forming in the gutters. Ice barriers can cause gutters to jam and overflow, leading to intense water damage. Heat cables gently warm the gutter area, keeping water flowing even during freezing temperatures. These cables are relatively easy to install; simply run them along the length of the gutter and plug them in when needed. This simple solution can save you the hassle of dealing with frozen gutters in the middle of winter.

Another effective way to save your home is by extending your downspouts. The extended downspouts ensure that water flows far enough away from the foundation to prevent issues like flooding or soil erosion. You can attach flexible extensions or rigid pipes to the end of each downspout, extending them at least 3–5 feet away from the house. If you’re looking for a DIY-friendly option, flexible extensions are typically easy to install and can be adjusted to direct water away from critical areas.

If trees surround your home, regular trimming can drastically reduce the amount of debris that falls into the gutters. Branches that hang over the roofline shed leaves, seeds, and small twigs directly into the gutters, leading to frequent clogs. Trimming these branches back reduces the need for frequent cleaning and minimises the risk of gutter blockages. This proactive measure can extend the time between cleanings and protect your gutters from heavy debris buildup.

Routine inspections are essential for maintaining your gutters and identifying potential issues early on. Look for signs of rust, loose sections, or holes. Minor issues can usually be patched up with sealant or replaced without hassle, but identifying them helps avoid more significant problems. A quick inspection after storms or heavy rainfall can also reveal any blockages or leaks needing immediate attention.

By following these simple DIY hacks, you can significantly improve your gutter system’s effectiveness and reduce the maintenance required. From knowing how to clean gutters efficiently to implementing practical solutions like downspout extensions and gutter guards, each tip adds value and longevity to your gutters. With regular care and a few preventative measures, your gutters can stay in great shape year-round, protecting your home from potential water damage and keeping maintenance manageable.

Eco-Friendly Practices for Modern Projects

wire and mesh

Using suitable materials is crucial in the quest for sustainability. For instance, wire and mesh products are increasingly recognised for their versatility and durability in various applications, from construction to landscaping. When protecting young trees, wire tree guards offer a reliable solution that safeguards and supports their growth. Such innovative materials contribute to eco-friendly practices in modern projects, ensuring that the built environment harmonises with nature.

As the construction industry evolves, it faces increasing pressure to adopt sustainable practices. The growing environmental concern has led architects, builders, and developers to explore eco-friendly materials and methods that reduce their projects’ carbon footprint. Implementing these practices not only benefits the planet but can also enhance the efficiency and profitability of construction projects. Here, we’ll explore several eco-friendly practices that modern projects can incorporate, focusing on materials, design strategies, and energy-efficient technologies.

The first step in promoting eco-friendliness in construction is selecting sustainable materials. The best practice is using local materials, which minimises transportation emissions and supports the local economy. Additionally, using recycled or reclaimed materials can significantly reduce the demand for new resources. For example, reclaimed wood can be used for structural elements or finishes, while recycled metal can be repurposed for various building applications.

Many eco-friendly materials are available, including bamboo, rammed earth, and recycled concrete. Bamboo is a fast-growing grass that is a strong and renewable building material, while rammed earth construction utilises natural materials and local soils to create durable structures. Additionally, wire and mesh products, such as steel or aluminium frames, can enhance structural integrity while being environmentally responsible.

Incorporating energy-efficient systems is another critical aspect of eco-friendly construction. Buildings consume significant energy, primarily for heating, cooling, and lighting. Some ways to reduce energy consumption include integrating energy-efficient appliances, HVAC systems, and lighting solutions.

wire tree guards

One effective strategy is to utilise passive solar design principles. Positioning windows and walls to maximise natural light and sun heat reduces the need for artificial lighting and heating. Additionally, installing energy-efficient windows can significantly improve insulation and decrease energy loss.

Another essential aspect of energy efficiency is the use of renewable energy sources. Many modern projects now incorporate solar panels, wind turbines, or geothermal heating systems to meet their energy needs. By generating clean energy on-site, these projects reduce their reliance on fossil fuels and decrease greenhouse gas emissions.

Water conservation is increasingly important in construction, especially in drought- or water-scarcity areas. Minimising water usage can significantly reduce a project’s environmental impact. For instance, installing low-flow fixtures in bathrooms and kitchens can help decrease water consumption without sacrificing functionality. One way of doing it is by adapting rainwater harvesting systems to collect and store rainwater for future use, reducing the demand for municipal water supplies. Furthermore, implementing green roofs or permeable paving can enhance water management on construction sites. Green roofs absorb rainwater, reduce runoff, and provide insulation, while permeable paving allows water to infiltrate the ground, replenishing local aquifers and reducing erosion.

Waste management is a critical component of eco-friendly construction practices. The construction industry generates a substantial amount of waste, often in landfills. By implementing a robust waste management plan, builders can minimise waste production and promote recycling and reuse. A practical approach is to conduct a waste audit before starting the project to identify potential waste sources. This assessment can help develop strategies to reduce waste and enhance recycling efforts. For example, separating materials on-site for recycling can divert significant waste from landfills. Another effective practice is to adopt modular construction techniques, which involve prefabricating building components off-site. This method can reduce waste and increase efficiency, as components can be manufactured precisely, producing less waste during assembly.

Many construction projects pursue green building certifications, such as LEED (Leadership in Energy and Environmental Design) or BREEAM (Building Research Establishment Environmental Assessment Method). These certifications provide a framework for assessing buildings’ environmental performance and can guide builders toward adopting more sustainable practices. Achieving green certification involves meeting specific criteria related to energy efficiency, water conservation, material selection, and indoor air quality. By pursuing these certifications, builders demonstrate their commitment to sustainability and can often attract eco-conscious clients.

Finally, engaging with the community can enhance the sustainability of construction projects. Involving local stakeholders in planning helps ensure that projects align with community values and environmental goals. This collaboration can lead to innovative solutions that address regional challenges, such as providing public green spaces or improving transportation options. Moreover, builders can consider the long-term impact of their projects on the community and environment.

Eco-friendly practices in modern construction are not just trends but a necessary shift toward a more sustainable future. Builders can significantly reduce their environmental impact by selecting sustainable materials, improving energy efficiency, conserving water, managing waste, pursuing green certifications, and engaging with the community. Embracing these practices benefits the planet and enhances construction projects’ overall value and appeal. As the industry evolves, all stakeholders must prioritise sustainability and work toward creating a healthier and more sustainable built environment.

Steps to Prevent Gutter Blockages

blocked gutter

When heavy rain causes gutters to overflow, it often means that downpipes are blocked and need immediate attention. Ignoring blocked gutters and delaying DIY gutter replacement can lead to significant structural damage and costly repairs. Adequate drainage is crucial for protecting the home’s integrity, and addressing downpipe issues promptly can prevent major problems. Here, we’ll discuss seven essential steps to keep downpipes clear and functioning correctly, ensuring the home remains safe and well-maintained in all weather conditions.

1. Early Detection and Assessment

Regular inspections of gutters and downpipes are crucial, particularly after storms or heavy rainfall. Overflowing gutters, water stains on exterior walls, or damp spots near the foundation are clear signs that the downpipes may be obstructed. Early detection is crucial in preventing minor issues from escalating into major problems. A quick check after severe weather can reveal potential blockages or damage. This proactive approach helps address issues before they cause significant harm, saving repair time and money.

diy gutter replacement

2. Safe Downpipe Assessment

Assessing downpipes requires careful attention to safety. Start by securing the ladder on a stable surface to prevent any accidents. Ensure the ladder is positioned at the correct angle for stability, and wear non-slip footwear to enhance grip. Use a sturdy wire or thin pole to probe the downpipe for blockages. Insert the wire, moving it in and out to test for obstructions. If there are concerns about climbing or working at heights, it’s prudent to consult a professional. Safety should always come first, and using proper equipment and techniques can help avoid potential injuries.

3. Clearing Minor Blockages

Once safely positioned, visually inspect the downpipe for visible blockages. If a blockage is detected, use a wire to break it up. Insert the wire into the downpipe and move it in and out to break the obstruction. This process can effectively address minor blockages that are accessible through the downpipe. After dislodging the debris, use a garden hose to flush out any remaining material. The water pressure will help remove residual debris and ensure the downpipe is fully operational. Regular clearing of minor blockages helps maintain optimal flow and prevents future issues.

4. Disassembling Downpipes

Disassembling the downpipe may be necessary for more severe blockages that can’t be cleared with simple methods. Begin by tapping along the downpipe to locate the blockage. A solid sound will indicate where the obstruction is situated. Carefully disassemble the downpipe section at this point. This process involves removing the affected segment and manually clearing out the blockage. Once the obstruction is removed, thoroughly flush the downpipe with water to clear any remaining debris. Reassemble the downpipe, ensuring that all parts are securely fitted. This method requires more effort but is effective for addressing stubborn blockages.

5. Seeking Professional Help

If DIY methods fail to clear the blockage, it’s time to call a professional. Plumbers have specialized tools such as sani-snakes or jet-rodding machines to handle severe blockages. These tools can navigate deeper into the downpipe and effectively clear complex obstructions. A professional plumber can assess the situation, use advanced techniques to resolve the issue, and ensure that the downpipes are restored to proper functioning. Relying on experts can prevent damage to the downpipes and ensure that all blockages are addressed thoroughly.

6. Preventive Measures

Prevention is always better than cure. Installing gutter guards prevents leaves, debris, and other materials from clogging gutters and downpipes. Gutter guards, including mesh and screen systems, come in various types and are designed to fit different roof styles. Installing gutter guards reduces the need for frequent cleaning and maintenance while keeping the drainage system running smoothly. These guards are a barrier against large debris, minimizing the risk of blockages in the downpipes.

7. Choosing the Right Gutter Guard

Selecting the appropriate gutter guard depends on the type of roof and the home’s specific needs. For instance, Klip-Lok and tiled roofs require different gutter guards. Consider the roof’s design and the local environment when choosing a guard. Some gutter guards offer additional benefits, such as deterring birds from nesting in the gutters. This can help prevent other issues related to blocked gutters and downpipes. Properly selecting and installing the right gutter guard ensures that the drainage system remains effective and minimizes maintenance needs.

Regular maintenance of downpipes is crucial to prevent water damage and costly repairs. Downpipes can remain functional by detecting issues early, safely assessing and clearing blockages, and using preventive measures like gutter guards. This proactive approach keeps homes safe and dry, even during heavy rain.

Bathroom Renovation Dos And Don’ts

vanities for bathrooms

Renovating your bathroom involves a thoughtful selection of vanities for bathrooms, ensuring they complement the overall aesthetic. When choosing shower taps, consider functionality and style to enhance your daily bathing experience.

One of the biggest challenges homeowners face when renovating bathrooms with their own hands is waterproofing. Spa showers are popping up in all types of bathrooms, but things like multiple jets and large rain showers can be tricky to install, some even need their own plumbing to accommodate the increased water flow.

Everyone loves a good shower, and if you have multiple bathrooms in your home, it is best to have at least one bath in one of the bathrooms.

If you are satisfied with the layout of the bathroom, but want a fresh aesthetic, it is best to simply replace fixtures such as toilets and sinks instead of moving around things. A simple bathroom faucet upgrade can greatly change the appearance of your bathroom.

shower tapsIf you have an outdated bathroom, you’ve probably thought about improving it by remodelling your bathroom. If you are facing the problem of renovating your bathroom, you should consider replacing your old toilet and facets.
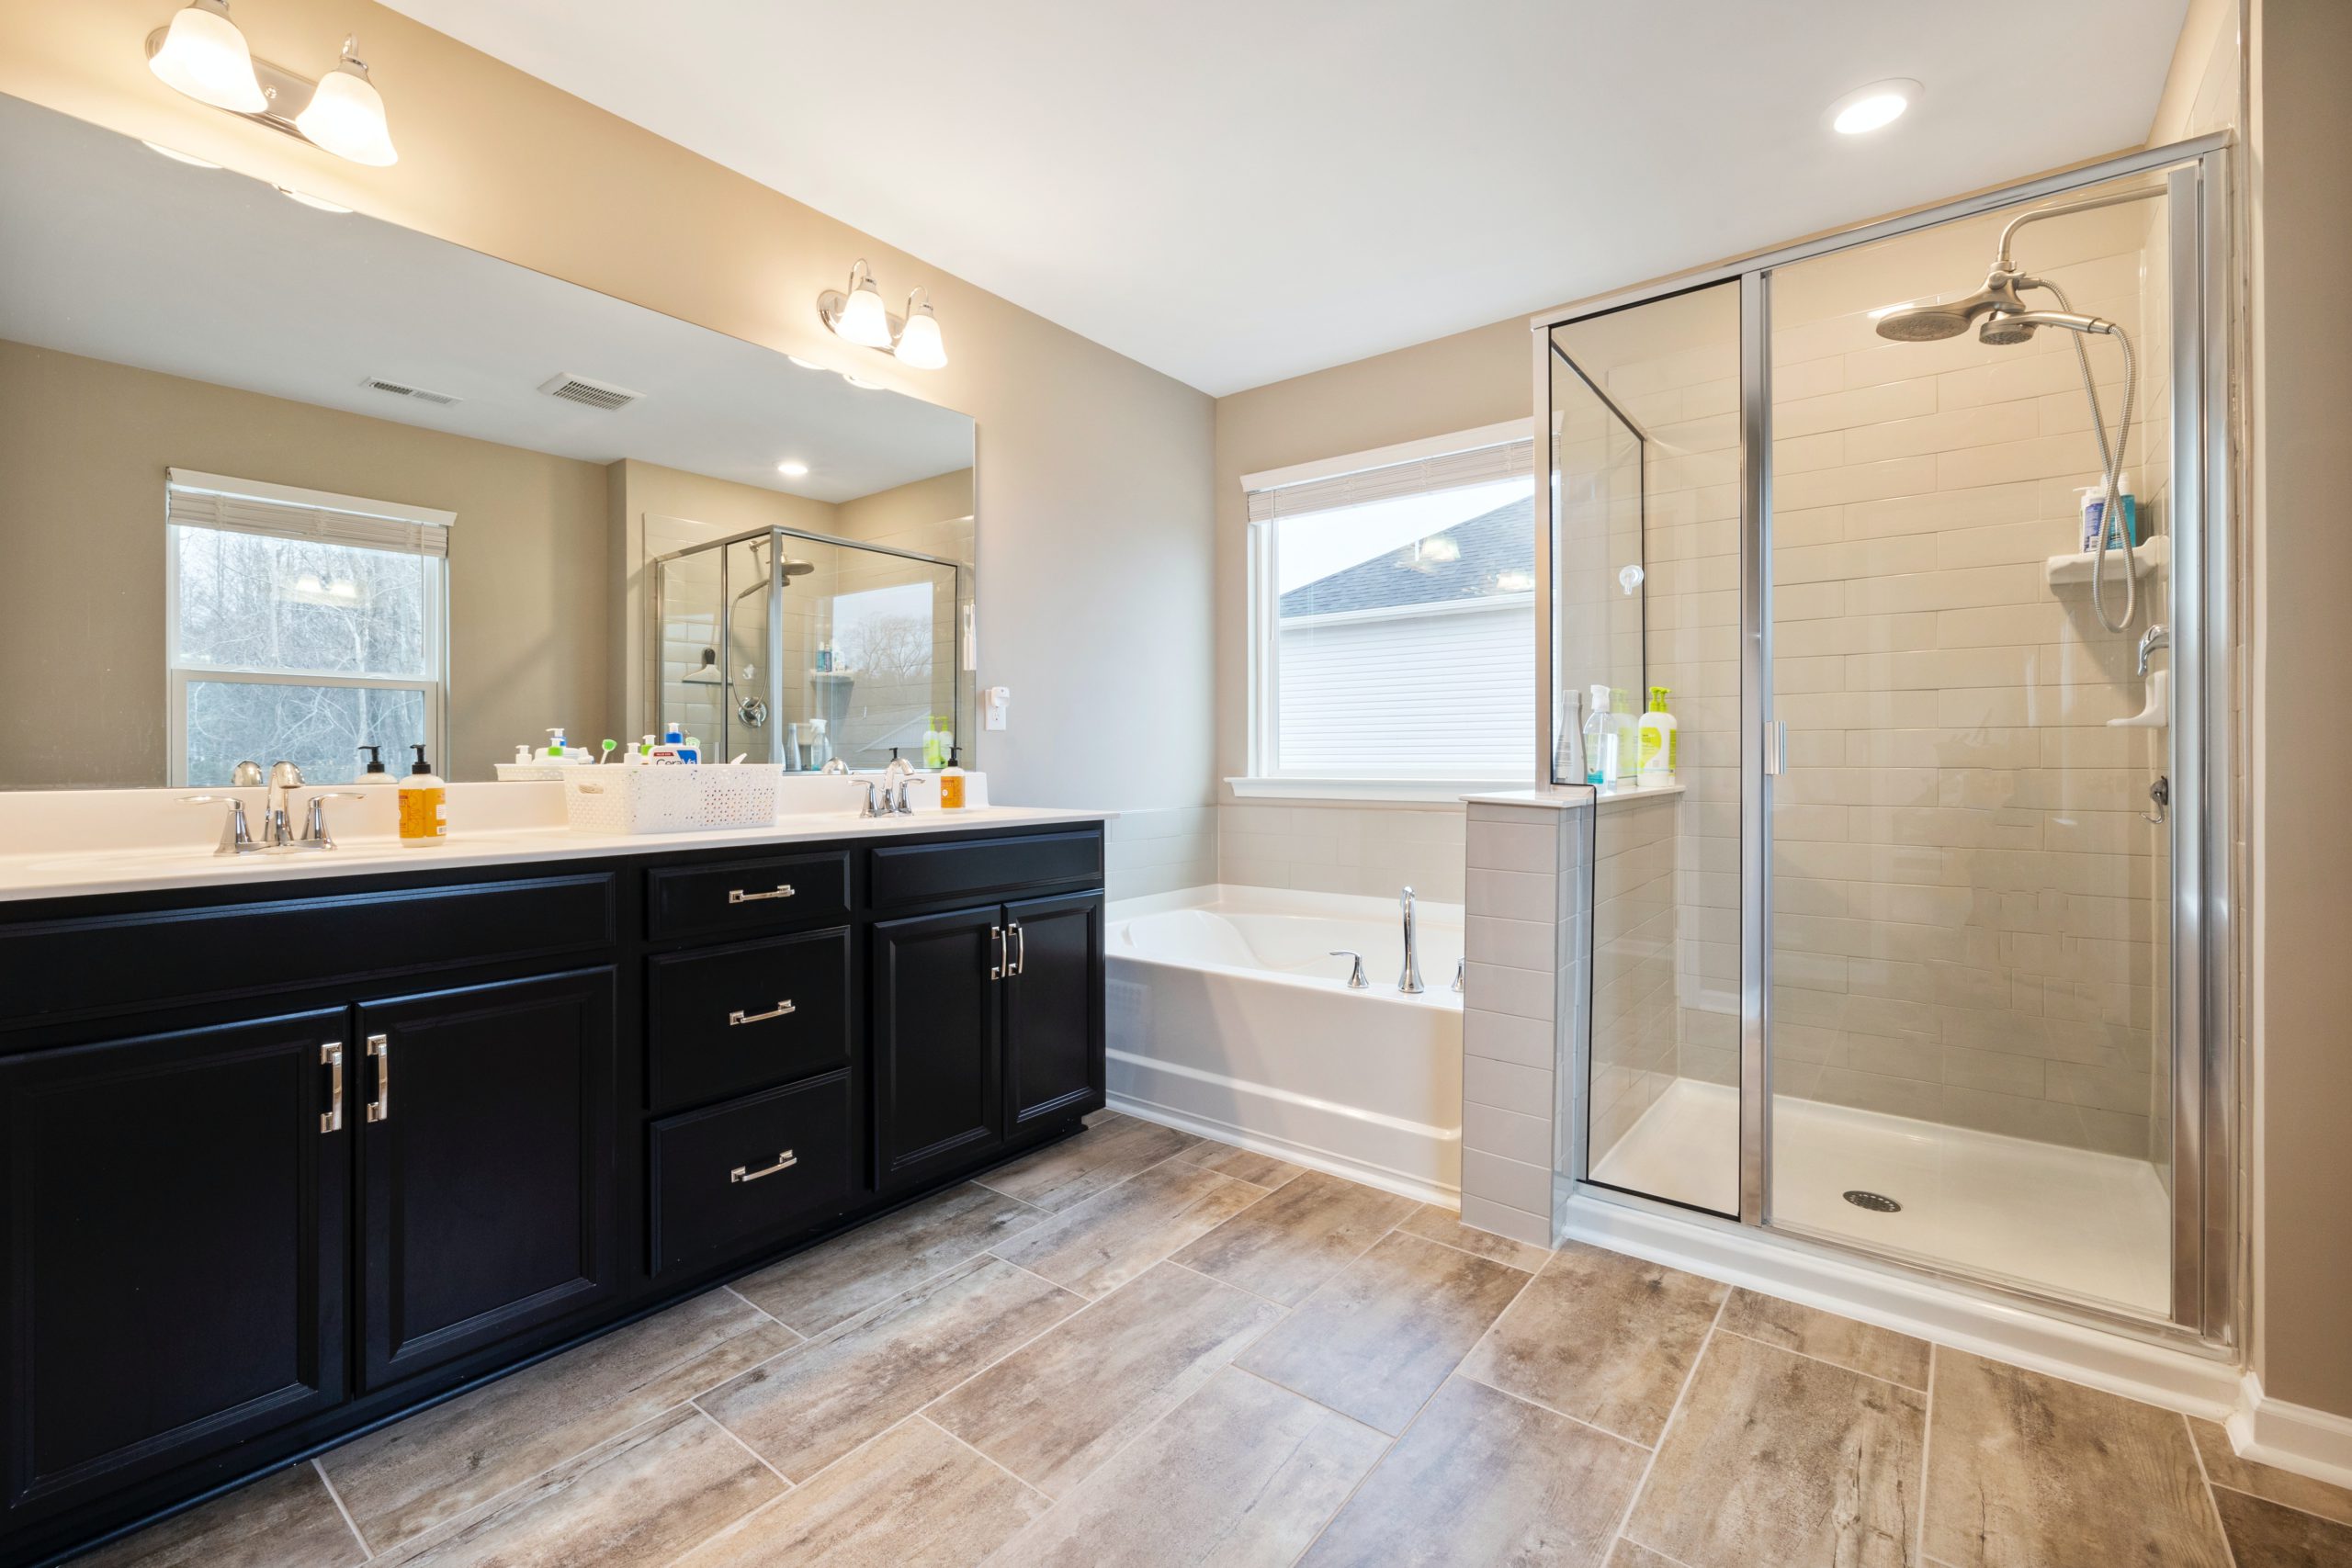
Buying from speciality bathroom stores and choosing reputable brands also means less headache down the road if you need a replacement. It is recommended that you work with a bathroom repair company to achieve the desired results. If you are permanently renovating your home and your family plans to use the bathroom for years to come, then be more daring in your design choices.

What To Do Next – Set an Additional Budget. You will almost always run into unexpected expenses on any bathroom remodelling project. If you are renovating the only bathroom in your home or depending on the bathroom you are renovating, make sure you can survive without a bath during this time. The bathroom is an important part of any home, so make sure you make your renovations as smooth and efficient as possible.

Regardless of how small or large your bathroom renovation is, it is important to keep the above rules and prohibitions in mind so that you can enjoy your new bathroom for years to come. Use the tips in this post as a guide to completing a successful bathroom remodel, and you will have all the tools you need to bring your vision to life. During the planning phase, you can keep this article in mind to make the right choices to get the gorgeous new bathroom you hope for.

You might think that a bathroom renovation will only take a few weeks because the bathroom is small, but the average small bathroom renovation takes 23 days from start to finish. Bathroom renovation seems to be a simple project because the space in the bathroom is too small. In fact, bathroom remodelling can be daunting because your small space has to do a lot for you.

When you are thinking about remodelling your bathroom, there are many different aspects to keep in mind. Unless you’re experienced in bathroom renovation, it’s very easy to go wrong when designing the space. So, before you embark on your project, read on to find out about the following common (or popular) bathroom remodelling mistakes, and be sure to factor in any necessary changes to your plans to keep your redesign going smoothly.

The bathroom is the wettest room in the house, so ventilation is essential. You should always consider it when planning a refurbishment or new space. If your bathroom does not currently have a source of ventilation, it should be placed at the top of your to-do list to prevent mould from growing. If the bathroom you are renovating already has a ventilation system, please use the renovation to update it.

When refurbishing a bathroom, take the opportunity to improve lighting and ventilation. Successful lighting design will make your bathroom safer and more energy-efficient. Make sure that your bathroom has plenty of natural light and good electric lights, which will also significantly expand the space. Recessed lighting is a great choice for bathrooms, especially in the shower area (just make sure they are suitable for use in wet areas and are of good quality).

A bathroom really needs to have multiple light sources, which means you can have a ceiling light, wall sconces to the sides of the mirror, and some extra light, or consider a combination for better overall lighting. The greatest energy efficiency you can add to your bathroom comes from LED lighting. And if you’re investing time and money in modernising your bathroom, don’t let your design choices go unnoticed in a dark, shady room – lighting will perfectly showcase your investment in a bathroom renovation.

All in all, plan your bathroom design carefully so you can make full use of the space without cluttering the room. During the planning stage, you should imagine everything you need in the bathroom and try to create a place to store everything you need. When planning your bathroom remodelling, remember to designate storage space for the necessary supplies. With ample and thoughtful space, even a small bathroom will seem larger than it really is.

The Impact of a Toilet Suite on Your Home

toilet suite

A toilet suite may seem like a simple addition to your home, but it can have a significant impact on your daily routine and the overall value of your property. From style and function to water efficiency and hygiene, the right toilet suite can make all the difference. In this article, we’ll explore the impact of a toilet suite on your home and why it’s worth investing in a quality one.

First and foremost, a toilet suite is an essential part of any bathroom. It’s where you start and end your day, and it’s where you take care of personal hygiene. A comfortable, well-designed toilet suite can make your bathroom experience more pleasant and enjoyable. On the other hand, an outdated or poorly functioning one can be a source of frustration and discomfort

One of the most significant factors to consider when choosing a toilet suite is style. The right style can transform your bathroom from a mundane space to a stylish oasis. Whether you prefer a modern, minimalist design or a more traditional look, there’s a toilet suite to match your taste. Keep in mind that the style of your toilet suite should also match the rest of your bathroom fixtures, such as your shaving cabinets and vanity.

Another important factor to consider is function. A toilet suite should be easy to use, reliable, and durable. Look for features such as dual-flush technology, which can save water and money in the long run. A soft-close seat is another great feature to consider, as it reduces noise and prevents damage to the toilet bowl. And don’t forget about hygiene – a rimless toilet bowl design can make cleaning a breeze and ensure maximum hygiene.

bathroom shaving cabinet

Water efficiency is another crucial consideration when choosing a toilet suite. Older toilet suites can use up to 12 litres of water per flush, while modern ones use as little as 3 litres. Look for a toilet suite with a high WELS rating (Water Efficiency Labelling and Standards) to ensure maximum water efficiency.

In addition to style, function, and water efficiency, a toilet suite can also impact the value of your home. A modern, well-designed toilet suite can add significant value to your property, while an outdated one can be a turn-off for potential buyers. This is especially true if you’re planning to sell your home in the near future.

When it comes to choosing a toilet suite, there are many options to consider. Wall-mounted toilet suites are a popular choice for their sleek, modern design and space-saving features. Floor-mounted toilet suites are a more traditional option but can still be stylish and functional. And then there are back-to-wall toilet suites, which offer the best of both worlds – a modern, streamlined look with the convenience of a floor-mounted design.

Finally, let’s talk about shaving cabinets. While not directly related to toilet suites, shaving cabinets are an important part of any bathroom. They provide valuable storage space for your toiletries, keep your bathroom clutter-free, and can even add to the overall style of your bathroom. When choosing a shaving cabinet, consider factors such as size, style, and functionality. A cabinet with adjustable shelves and ample storage space can make all the difference in keeping your bathroom organized and functional.

In conclusion, a toilet suite is more than just a simple fixture in your bathroom – it’s an essential part of your daily routine and the overall value of your home. From style and function to water efficiency and hygiene, there are many factors to consider when choosing a toilet suite. Don’t overlook the importance of shaving cabinets, which can also impact the functionality and style of your bathroom. Invest in a quality toilet suite and shaving cabinet to create a bathroom oasis that you’ll enjoy for years to come

Selecting the right toilet suite and shaving cabinet can make a significant difference in the comfort, functionality, and overall value of your home. By considering factors such as style, function, water efficiency, and hygiene, you can create a bathroom that is both practical and stylish. So, take the time to research and invest in quality bathroom fixtures that meet your needs and reflect your personal taste.

Transform Home With An Architectural Builder

architectural builder

Home remodels and architectural design can transform your home with an architectural builder. Residential architects, real estate developers, and homeowners all have the opportunity to benefit from an architectural builder. England Design is a premier independent house in New England offering five ways to help private clients with their remodeling needs. Architects focus on the layout of your space, helping you decide how best to use it for optimal functionality.

If you are looking to transform your home with an architectural builder, many architects are available to help. Residential architects specialize in creating individual floor plans for single-family homes, while landscape architects specialize in designing outdoor recreational spaces such as golf courses. The entire project can be managed by the contractor who hires the architect(s) and works with them to complete projects within budget and timeline constraints.

An architectural builder can help transform your home with custom home design, and by using a home designer or home builder, you can have many builders at your disposal. The staff designers will be able to give you customization plans to fit your needs. If you do not need the services of a separate architect, then this could lower the cost of the project. An architectural builder works with architects to create unique designs that meet client specifications.

They consult with interior designers to ensure the house is set up in a way that looks aesthetically pleasing. Furthermore, they work with structural experts to make sure the home is built according to code and other regulations. A base contract is established at the beginning of each project which outlines all of the necessary tasks that need to be completed for it to be finished on time. The builder and their team have a certain capacity per day which allows them to focus closer attention on ensuring everything goes as planned.

A team of three experts, including an architect, a builder, and a designer all collaborate to bring your vision to life. With their expertise in custom designs and incredible things, you can transform your home to the next level. The architect will discuss the plans for scale renovations and custom homes with you and will provide a projected timeline for the project. The builder is responsible for ensuring that the construction is done according to these plans within budget. The designer helps put together a plan that looks at all aspects of interior design according to what suits your style best.

Architects take center stage in the entire process; from the construction phase to installation day. Having three experts involved allows for close communication between all parties and multiple days of work to ensure enough space is allocated in the budget. The architectural builder will manage the entire process from start to finish, with the architects at the center, ensuring that everything is done correctly and according to plan. This helps minimize any risks or delays on construction sites and makes sure that your vision for your home comes true on installation day.

An experienced architectural home builder can help you create a design that meets your lifestyle requirements, zoning regulations, and budget. Their award-winning architects will work with you to develop the best plans for your home design and renovation projects. From initial consultation to finished plans, an architectural builder will guide you through the entire build process. They understand how important it is that your dream home meets not only zoning requirements but also your expectations in terms of style and functionality.

architectural home builders

A good architect will be able to provide the best possible plans for your home and help you create a design that works for you, your family, and your budget. With their expert knowledge of zoning requirements and building codes, an architectural builder can help you make the most of your space while keeping safety in mind. When it comes to renovating or remodeling your residence, a home designer is also invaluable. By listening carefully to what’s on your wish list, they can come up with ideas that not only look great but fit into the existing architecture while staying within budget. An architectural builder will then take those plans and figure out the best possible way to get them built – including making sure all materials are available at reasonable prices.

The remodel process is an important part of transforming your home and it is essential to choose a good remodeler. When you work with an architectural builder, the entire design process involves the collaboration between homeowners, architects, and team members. The architects can help you select new home appliances that are energy efficient and recommend which materials should be used in various parts of the project. This way, all the parts of the house are unified under one specific design vision, allowing for a more cohesive look once completed. Additionally, if any used parts can be reused to save costs or simply add character to your home’s architecture then they can advise on this too!

An architectural builder can transform your home with a unique and beautiful design. An architect will help determine the details of the design and create a home plan that meets your needs and vision. They can develop visuals to bring your project to life, while also considering budget limitations. By combining modern technology with traditional building methods, they can create something that is both visually pleasing and practical at the same time. With their extensive experience in designing projects, they can help you through every step of the process to ensure that your dream home comes alive as intended.

Architectural home builders have been a popular choice for many new homes in suburban zones and developments. Their team of experienced architects, technicians, and draftsmen will focus on your project to bring it to life. Captive architects can help you build a custom home model that is tailored to fit your budget as well as create something unique that you can be proud of.

A Closer Look At Workplace Design In Melbourne

workplace design melbourne

Workplace design in Melbourne is changing drastically, with the top 2023 workplace designs and next office fitouts focusing on the latest design trends. Companies are looking for an effective design strategy for their office space that will benefit both employees and businesses alike. Taking a closer look at workplace design in Melbourne reveals new workspaces that promote collaboration and productivity, creating a pleasant work environment conducive to employee development. The latest trends focus on providing offices with comfortable workspaces, encouraging creativity and collaboration while also providing businesses with cost-effective solutions.

Workplace design in Melbourne is an important factor for businesses to consider when looking to improve their workplace culture and maximize returns on investment. Utilizing a workplace design partner can be incredibly beneficial, as they can provide expert advice on office design and development, as well as a detailed workplace strategy. This will ensure that the business’s needs are considered carefully before committing to any kind of next office fitout or re-design. It is also worth noting that while there may be potential benefits from investing in new workspaces, careful consideration should be given to whether such investments would benefit the company’s work.

Melbourne has seen a surge in companies investing in smart workplace design, with the idea that it will create an improved work environment for employees. It is thought this can have a happy side effect of drawing in quality candidates and also creating positive effects on productivity. The focus for many offices appears to be on creating strong connections between nature, work, and the office environment. This is one of the major trends that we are seeing in Melbourne’s workplaces.

Various biophilic design elements are being incorporated into office spaces to create an environment that is more natural and inviting. These features often include elements of nature such as water features, natural light, and plants. We are also seeing hospitals embrace biophilic design by incorporating natural elements like wood and stone into their built environment.

workplace design melbourne

One of the most successful examples of this is the Hayball work done for School Dandenong and Dandenong High. The firm Hayball used natural materials such as timber, stone, and glass to create a dynamic environment that was both contextualized to the architecture of Melbourne and modern in its design. It is also notable that Hayball’s work was able to transform a traditional school into an inviting office environment with glass doors that open up onto lush gardens. This biophilic design approach has been embraced by many Australian architecture firms who are looking for ways to make their designs more sustainable and environmentally friendly.

One of the firm’s winning projects is Wardle Architects in Melbourne. This firm is known for its Hayball Philosophy, which focuses on the design process and how it can be used to create a unique work environment. The philosophy also emphasizes sustainability, practicality, and value creation through design. The Victoria Docklands project was developed in collaboration with another Australian firm Hayball, which has expertise in interior design. This project aimed to create a modern office space that reflected the vision of both firms; focusing on using natural materials such as timber and plants to bring nature into the workplace. This allowed employees to enjoy their work environment while having access to natural light, green spaces, and fresh air. They have helped to create a more cost-effective solution for the workplace by using an open office design. This reduces the need for expensive equipment and office supplies. It also allows workers to share printers, which helps to reduce overall costs and expenses associated with equipment. Additionally, temperature control is easier in an open space as opposed to many walls separating offices.

As an example, their mobile office furniture can be easily moved to fit any size space and reconfigured as needed. This open office interior design also allows for more collaboration, which is a major trend in workplace design today. Open-plan offices are becoming more popular in Melbourne, with many companies choosing to adopt this useful design trend. The ABW (Activity-Based Working) environment is also gaining traction in Melbourne offices as a way of encouraging creativity and collaboration among employees while still providing an open environment that allows them to work without feeling cramped or distracted. The idea behind an ABW office is that it encourages people to move around the workspace, which can help them stay focused on their tasks and increase productivity. The ABW environment also promotes different types of activities within the same space – allowing employees to switch between tasks easily without having to leave their desks or move furniture around the room.

With the right workplace design strategy, companies in Melbourne can not only create an environment that communicates its culture and personality but also provide a space that allows employees to be productive and comfortable while they work. Workplace design is an extensive evidence-based process that involves looking at numerous factors such as ergonomics, air quality, lighting, temperature control, and acoustics. It also involves creating visual shorthand for employees to understand their workspace – like adding color or logos to furniture pieces or walls. Ultimately, workplace design in Melbourne should be thought of as another tool in the company’s toolbox – one that can help shape how employees perceive the company’s values and culture. By creating an environment where people feel like they belong – just like putting on a glove – companies can ensure their employees are happy and productive while working in their workspace.

Best Way To Restore Your Deck

deck rejuvenation

Find the best local contractors and compare the services of deck restoration Melbourne wide. If your deck is covered with a clear sealer or clear or translucent stain, you can simply clean the surface with wood floor cleaner without worrying about paint stripper and get your deck rejuvenation happening.

By removing the existing finish, you ensure that the new stain hits the fresh wood surface, creating better adhesion and a durable finish. Make sure you only apply the amount of wood stain that the wood can absorb when applied.

If you are working on a new wood surface that has been previously painted or varnished, clean the wood surface. If you have a lacquered or painted wood deck and you want the wood deck to be coloured, you must first remove the paint or varnish from the deck surface with a chemical paint remover.

Simply apply a thick coating of acrylic repair to an old wood deck to create a smooth finish that will last for years. Even if you stain or seal a wood deck, the planks can still crack and chip, making the deck look old and worn. 

The deck boards themselves are old and while they are still strong, the boards have started to crack and the paint has peeled off.

The best way to prepare a deck is to clean, sand and pressure wash the entire deck. A deck rejuvenation project like this can be completed in two days, but it’s best to spread the work over two weekends to make sure the wood is completely dry before applying the stain. 

After completing Step 1 with the Cleaner or Wood Stripper, as appropriate, a brightener can neutralize the pH of the surface and ensure proper stain application. When finished, vacuum well or rinse with water to remove dust and apply ipé oil.

Rinse the deck thoroughly after using this chemical, as it can eat away at the wood, causing premature washout and greying. 

While it’s not necessary to use a pressure washer for deck finishing, I highly recommend doing so.

As you can imagine, the cost of restoration depends a lot on the size of your deck, but if you want to, it can be done for less than $100. In the next post, I will share other deck renovation projects using this stain color.  

While our inexpensive deck restoration project cost more than we expected, it was much easier in your pocket to replace the entire deck.

We estimate that it would cost approximately $1,500 to replace ALL decking boards on our 30-year-old cedar deck with cedar. We painted the bridge with Behr Premium transparent penetrating oil in the colour of the wood.

Benefits Of Sanding Your Deck

deck sanding and staining

One of the benefits of sanding a wooden deck is to get a clean and smooth surface, removing chips and roughness. Staining the deck and sanding are two ways to remove the finish from the deck and bring back the original raw wood. Deck sanding and staining are the two most popular methods of removing the coating from the deck and returning it to the bare wood.

deck sanding and staining
Sanding is one of the most common ways to remove paint from any wood. These two methods are often used to remove unwanted finishes from decks or other wood surfaces, especially if many layers have been applied over the years and the wood grain is no longer visible and looks like painted wood. With this method, chemicals are used to strip/remove existing finishes from decks or other outdoor wood surfaces. A way to change this after using a yard cleaner is to use wood polish.

However, if water is being absorbed or repelled, if you decide to go ahead and apply a stain, always apply a light wood stain remover and then pressure wash the deck before any stains to make sure you prep the wood.

One of the most frustrating problems that can arise when you decide to paint or repaint your deck is that the wood stain doesn’t absorb properly into the wood. A bad job with sanding leads to a bad look when the deck is painted and that’s what you’re stuck with until you do the job again. Sanding and repainting the deck is an important job that should be done regularly.

Sanding is only one piece of the puzzle, but it is a very important step in repairing and preparing your deck. Sanding is more about feeling the deck than preparing it for a new stain. In particular, old bridges are best sanded thoroughly before painting.

If you are changing the colour of a stain or trying to remove paint from a deck, you may need to sand the deck. Heavy sanding of your deck will not affect the absorption of the wood stain into the wood – the product is designed to absorb.

If you use too much sandpaper, especially fine sandpaper when sanding your deck, the pores will narrow and the amount of material the wood can absorb will decrease. Sanding the deck with finer sandpaper can tighten the pores and reduce the amount of material that the wood absorbs. However, you can still use these soft sandpapers to polish your deck and make it smoother. This chip is great for sanding old floors, especially if they haven’t been sanded in years.

When replacing sanders, be sure to use sandpaper with the same grit as the other sanded areas to keep the deck floor level. When sanding any type of wood in preparation for applying a new stain, you must be extremely careful with how hard you sand the wood and with the grit level of the sandpaper you use. By sanding before applying a new coat of stain, you ensure that the stain adheres well to the wood and lasts for many years before a new coat is needed. Once you’ve sanded and tidied up the deck, you’re ready to apply a new paint colour or a new stain to give it the new look you want.

Preparation is the key to a high-quality finish, so if you are planning to restore wood decking, the first step before applying a new coat is to sand the deck well.

Interior Design Trends That Are Here To Stay

Whether you are looking to renovate your home or just keep up with the times, keeping up with new trends in interior design will help you stay on top of the latest developments. Design and fit out companies needs to stay on top of the latest home design trends that you can use to decorate your clients’ homes.


Many people’s attitudes will change in 2021. Many people hope that the new year will have a more pleasant start. Let’s take a look at interior design techniques and trends in 2022 and beyond. From our lifestyle at home to the dominant colours and overall appearance, here are 20 interior design trends that will continue until 2022.


Well-made furniture is a must – an object that shapes and sway, subtly reflecting the organic silhouettes found in nature. The custom design will make the most of precious square inches in corners, under stairs, or behind partitions that can be used as a closet. Where space isn’t an issue, home offices inspired by galleries and libraries are great.


Travelling to distant exotic locations may not be planned yet, but that doesn’t mean your home decor has to stay in one place. Say goodbye to boring walls and say hello to bold, vibrant, geometric and floral wall designs. This is an exciting time to decorate as you risk design to reap a visually exciting reward.


More and more people are turning to minimalism with cheeky, fun energy filled with quirky, quirky and alluring furniture. The designs are also inspired by shapes and prints from the 70s and 80s. This is the case with several innovative rooms and furniture designs from House Beautiful Whole Home.


Next year, we expect to see more elaborate interiors that convey a sense of comfort and individuality. We’ve had so much time to reach out to ourselves, and now we have the space to design every aspect of our lives from a more deliberate perspective. Since 2022 is the Year of the Tiger, we expect it to be bolder, livelier, more rebellious and regaler than ever.


Below, we’ve outlined a 10-trend forecast that we believe will shape interiors in 2022. Through all of these TLCs, we’re seeing a glut of home decor and design trends coming and going over the last year or so – few choices choke on and turn into a full-blown phenomenon (we’re looking at you, dramatic marble), while others are just edge, waiting for fire from homeowners. If so, today we’re going to focus on what’s left, as well as some of the trends that are making a comeback.


Taking an example from the spirit of the 60s and 70s, this modern style was the culmination of those funky days when strange angles and vibrant colours made themselves felt in the house. If a style can be retro and modern at the same time, this design is an example of that. In addition to sage green, one of the strongest style trends to emerge in modern kitchen design is blue, and it can be traced from classic shaker-style kitchens to chic and minimalist modern spaces.


In recent years, grey has dominated the neutral interior palette. White kitchens had their moment, and now designers are opting for brighter furnishings paired with natural wood furnishings, large and vibrant panelling, and mixed metals. Deep shades of black and grey are combined with vibrant and colourful design elements.


While this trend is quite popular for nurseries and nurseries because the average person is less afraid of taking design risks in these spaces, we also see more murals in living rooms and burrows. By introducing designer pieces made from translucent materials such as coloured glass and iridescent crystal, they can create a glowing effect when placed in an area of ​​the home with lots of natural light. There is nothing better than making a good first impression, and designers predict that the entrances to our homes, including foyers and hallways, will receive a lot of love and attention in the next year. A study by American online interior design service Modsy found that working from home has already had a big impact on our furniture and increasing the need for workplace design schemes.


The limited personal workspace was Modsy’s number 1 disappointment in their existing, often impromptu home office configuration. Multifunctional premises. With the outbreak of the pandemic, when everyone was at home, the rooms in our house suddenly began to turn into offices and classrooms. We were challenged to change our ways, and as a result, the cultural change was enormous.


While it is impossible to know exactly what will happen in 2022, we have an idea of ​​what it might look like – we take vibration control very seriously in our work.


However, space design agencies are predicting the rise of several profiles in 2022, giving each kitchen, bathroom half or hallway an air of individuality. According to interior designer Harriet Anstruther, in the next decade, people will recycle, renovate, and personalize their home accessories. A growing trend in interior design that is becoming more and more popular is the demand for furniture and home furnishings that are produced sustainably and reduce waste. Eco-friendly materials. Green interiors will be trending in 2022.


“Projects using natural stone and glass products with a timeless design are sustainable. Many design trends penetrate our interiors, but they quickly change or disappear into oblivion.


These are just three top home design trends that will remain in 2021 and are welcomed by both designers and users around the world. Read on to learn about the top home design trends that architects and interior designers anticipate will continue to emerge in the next years, as well as those that will go away as 2022 approaches. In 2022, biophilic design ideas will remain popular, with an emphasis on creating serene, plant-rich surroundings that visibly connect with nature.


Leaving more natural light indoors, especially during the winter months, is a new trend in 2021, according to designer Michelle Martel. And as people stay at home more than ever, filling your home with light can do wonders for their health.

How To Improve Your Old Decking

Deck rejuvenation

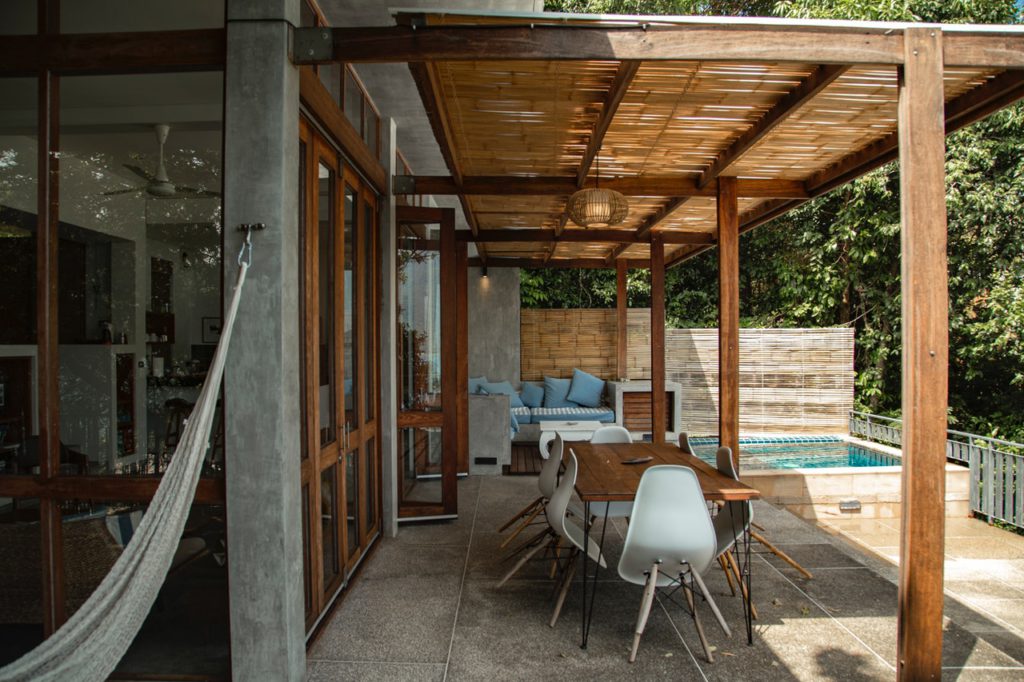
If you need to improve your outdoor decking area, this is the article for you. In this article, we will cover how you can breathe new life into an old and outdated deck without having to spend big dollars on renovations. Deck rejuvenation doesn’t just need to be done through direct physical work done to the decking itself. You can add some character to a boring or rundown decking by adding new features in the surrounding area. One great example is building a timber screen in areas adjacent to your decking, allowing for some privacy and adding style and uniqueness to your outdoor space.

Of course, if your decking is simply out of condition due to years of neglect, then no amount of new additions will take away from things such as discolouration, rot and any other symptoms of a poorly maintained deck. In these cases, it’s in your best interest to look into some services that can come out and bring your deck back to life. There is a large range of businesses located in Victoria that specialize in deck treatment as well as floor sanding and polishing for your interior flooring.

floor sanding and polishingIf your deck is in good condition and doesn’t require any restoration, then as previously mentioned, something such as a timber screen will do wonders to help create a new stylish space. If you’re wondering how to build one yourself at home, look no further! We’ve outlined how you can do so below; you’ll need:
  • Drill driver
  • Mitre saw
  • Measuring tape
  • Pencil
  • 30 mm galvanized button head screws
  • 42mm x 18mm long Merbau screening
  • 90mm x 19mm long Merbau decking
  • (PPE) Personal Protective Equipment
  • Screen-up channel kit (19mm x 2m side fix screening system is ideal)
  • Spacers (Use the 10mm spacer.)
  • Spirit level

Steps in installing a timber screen:

  1. Installing the 1st channel

Ensure the lug in L-shape supports the screen from the base by letting the 1st channel lean on a structure. Then ensure the channel is perfectly straight as you mark the holes with the help of the spirit level held vertically. Follow it up by securing the right fixings for your surface.

  1.        Getting hold of the workable space by measuring

Measure the entire area between the back of the fitted channel and its opposite surface. Then subtract 4mm from the marked value, allowing space for the channel’s width and the screw heads.

  1.        Installing the 2nd channel

This time around, measure the length of decking. Then make a template by cutting a slat using the mitre saw. By then, position the remaining channel as you insert the slat to rest on the lugs situated at the base. Afterwards, check the slat and channel if they are straight before securing, using the spirit level.

  1.        Slat cutting

As you remove the slat, your template is ready to use. Cut the remaining slats with it. Then, insert the base slat into the top of both channels, then slide it down to rest on the lugs.

  1.        Building the screen

Insert into each channel a spacer, then let the 2nd slat slide into position. Repeat to complete the screen using the template beginning with the top slat. Finish it with the supplied caps on top of the channels.

General considerations:

When building the screen, make sure to install a sturdy structure on either side to give it a stronghold. Cut your timber in appropriate equal widths according to your measurement. Then slip down spacers into each channel, beginning from the top to fill the gaps evenly.

Finally, when considering building any structure to complete an exterior façade, treated timber or hardwood is what’s ideal. Always use stainless and galvanized steel fasteners.

The Benefits Of Using Furniture Oil

outdoor furniture oil

When it comes to wood finishes, Danish oil is one of the most common wood finishes and widely used oils. If you are shopping for Danish wood furniture with an oil finish, we recommend that you consult with a professional to find out which brand of Danish oil they use and do a little research to make sure it will suit your lifestyle. If you want to preserve the characteristics of the wood and also improve its protective properties, wood oil may be the best finishing option, rather than wax or varnish. 

The depth of wood oil penetration into the wood surface will never exceed a few microns, so clean bare wood can be restored without excessive sanding. When applied to bare wood such as pine or maple, it will darken the wood after good coverage. In order to prevent trees from blooming naturally, you need a UV-resistant oil.

Using Danish oil as a primer will increase the performance of the wood paint and provide additional protection for the wood surface from cracks and scratches. Danish oil can be combined well with new untreated wood surfaces for a lighter texture compared to a longer drying time than linseed oil.

Some people think that olive oil damages wood furniture, but olive oil nourishes the wood and gives it a natural shine. The same goes for when you want to oil your new deck that you’ve just built.

Wood oil cannot be applied to outdoor wood furniture, but special teak oil can be applied to teak indoors (note that it is not made from teak). Here, you can purchase specialised outdoor furniture oil. Tung oil or linseed oil can be used to peel maple trees and bring out curved or striped wood grain. 

Unlike synthetic alkyds, oil coatings, including linseed oil, penetrate the wood structure rather than form a film on it. Like other hand rubbed linen coatings, linseed oil penetrates deeply into the wood structure, protecting it from scratches and moisture changes. It is easy to care for, sustainable and provides a matte finish that truly brings out the color and texture of the wood. 

Carpenters, joiners, craftsmen and hobbyists all love tung oil and have used it over the years as a beautiful and protective finish on a wide variety of projects and surfaces. For example, tung oil gives fantastic results for wood, bamboo, concrete, stone, brick and even metal surfaces. Tung oil is a favorite for finishing hardwood floors, furniture, terraces, siding, furniture, guitars and other musical instruments, handmade toys, and more. Tung Oil, a tung tree nut extract native to China and South America, is a natural drying oil that coats your precious wood furniture with a clear and moist finish. 

In addition to creating beautiful and protective finishes, tung oil is also a popular choice for projects because it is versatile, easy to use and environmentally friendly. For thousands of years, pure tung oil has been popular for its protective waterproof coating formed on wood and other porous surfaces. In short, using this variant of tung oil on wood surfaces can make them appear incredibly waterproof and rich in dark colors. In short, applying tung oil on the surface of wood will give it a deep color and water resistance.

Thanks to Danish wood oil, it provides reliable protection to the wood and hardens in the sun, and applying several coats of tung oil can make the wood board look brighter and brighter. This is a good idea for any type of oiling wood, but because it is so safe, it can also be used for mineral oil blends. Add a little beeswax to help the oil last longer, and buff the wood to brighten the surface.

After you find the bare wood, you can apply varnish, lacquer or other oils. Before using mineral oil on kitchen cabinets and wood cutting surfaces, read the facts about using mineral oil on wood. Mineral oil is not only safe, it is non-toxic to wood, yes, but it also provides additional benefits when used on wood. Mineral oil is one of the least controversial oils and is usually used to treat wood to give it an unparalleled luster. 

If wood oil is used to treat different types of wood in objects or in the same room, remember that one oil gives a different (visual) finish to different woods. The type of oil used also depends on whether the wood will be used indoors or outdoors. Danish natural oil will help in hardening, the wood will not become greasy and will remain dry. You will need to apply mineral oil regularly – this is not a durable wood product, unlike oily finishes designed to protect wood.

On the other hand, oils tend to enhance the properties of wood better. They are made from natural products and are very easy to apply and maintain. Although some oils have certain water resistance properties, oil-based paints (especially linseed oil) are often unable to retain moisture in the wood. The protection provided by oil is not as reliable or effective as modern wood finishing products such as paint.

Oil stains can be used successfully on some highly absorbent woods, such as cypress, which becomes very rough and porous when trying to stain the water. A drying oil such as linseed oil, if not bleached, darkens the wood even without mixing with any color. Oil paints can be mixed with wood putty, which allows you to combine painting and pouring in one operation.